Sending authenticated SMTP alerts from Zabbix
I like to use SMTP wherever possible for automatic emails because it’s usually simpler and has fewer security gotchas than running a local MTA. Zabbix does have SMTP support but it’s currently limited to unauthenticated connections—not much help to a home user like me. I don’t have a mail server on the local trusted network.
Fortunately it’s a pretty easy to hook up a script so that Zabbix sends email via Mutt, which does support authenticated and encrypted SMTP. There are a few opportunities for things to go wrong so we’ll cover those as we go.
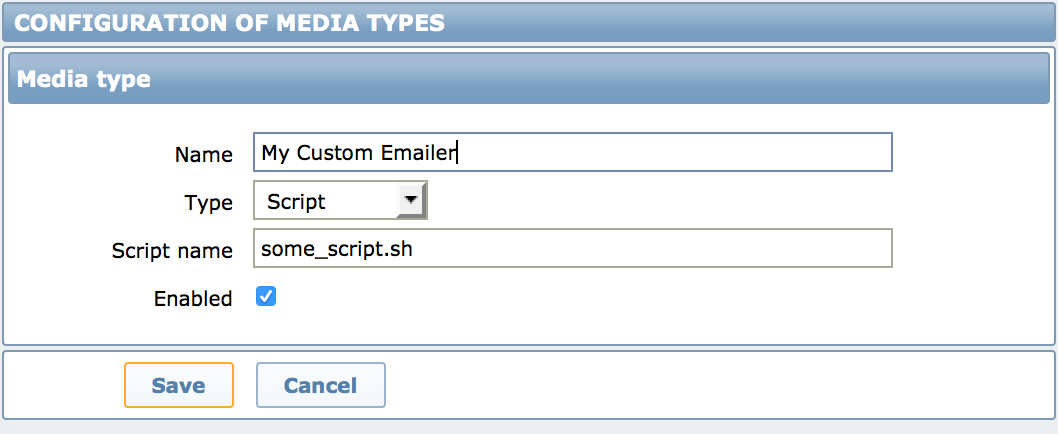
Creating a new media type
We’re going to ignore Zabbix’s default Email media type and create our own of type “Script”. You can give it any name you like but you must be careful about the script name. Absolute paths do not work here. If you have a script called some_script.sh you should place this in Zabbix’s alerts.d directory. On my Debian installation I had to place my script at /etc/zabbix/alerts.d/some_script.sh. Make sure it’s executable by the user under which the zabbix server is running, probably zabbix.
Script contents
Once you’ve decided what to call your script and where to put it, insert these contents:
#!/bin/bash

to=$1
subject=$2
body=$3

echo "$body" | mutt -F /etc/zabbix/mutt.conf -s "Zabbix $subject" "$to"
When zabbix runs the script it passes in three command line parameters.
- Email address to which the message should be sent
- Subject for the email
- Body of the message
The last two of these are configured by the “subject” and “message” of the Zabbix Action that caused the message to be sent.
We put those parameters in some variables with better names than $1, $2 and $3 then invoke mutt to do the dirty work of actually sending the email.
We need to address a loose end here: the home directory. At least on my debian installation the unprivileged zabbix user did not have a normal home directory—it was set to /var/run/zabbix. This is a problem for mutt as it wants to create files for its cached SSL certificates and sent email and so on. These could probably be worked around but for me it was simplest to do the following:
- Create
/home/zabbixand change its owner tozabbix. Mutt can store whatever it wants in here. - Change the
zabbixuser’s home directory from/var/run/zabbixto/home/zabbix.
Mutt configuration
Now we need a valid mutt configuration. This could be anywhere but I thought it would be cleanest to keep it at /etc/zabbix/mutt.conf. Since it contains credentials I set the permissions to be only readable by zabbix. If you need something a bit different please refer to the mutt documentation.
set realname="Zabbix Server"
set from="zabbix@example.com"
set use_from=yes
set smtp_url="smtp://username@mail.example.com:587"
set smtp_pass="password"
Because the email host I’m using is braindead and doesn’t have SSL certificates that pass verification I also had to add the following two lines. This is not sensitive communication so it doesn’t worry me too much.
set ssl_verify_host = no
set ssl_verify_dates = no
If Mutt fails to send an email you get no feedback at all, which is pretty annoying. The best way to make sure this is all working is to run mutt interactively:
$ su
(log in as root)
# su zabbix
$ mutt -F /etc/zabbix/mutt.conf
Hit m to compose an email and follow the prompts. If you need to confirm any SSL certificates you can do so, which will allow mutt to remember your decision. If you are able to send an email to yourself you should be ready to go.
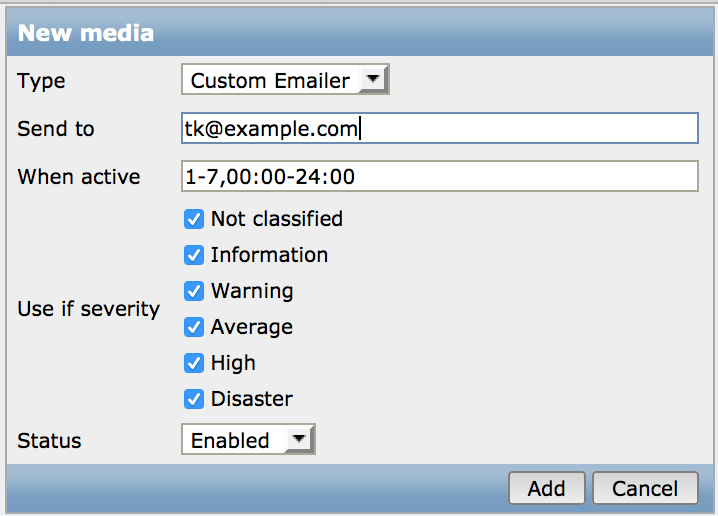
Add new media type to Zabbix user
Once all of this is set up you just need to go to User configuration, select the Media tab and add a new one. Select the name of your new media type and use an email address in the “Send to” box.