Quick screenshots to clipboard on Kali 2018.2
Everyone has their own favourite way to take notes in Kali. For me it involves copy-pasting lots of snippets into a CherryTree workbook.
One thing we can probably agree on is that we don’t want to press too many buttons every time we take a screenshot. I wasn’t happy with most of the suggestions online and did some experimenting. This is what I have now:
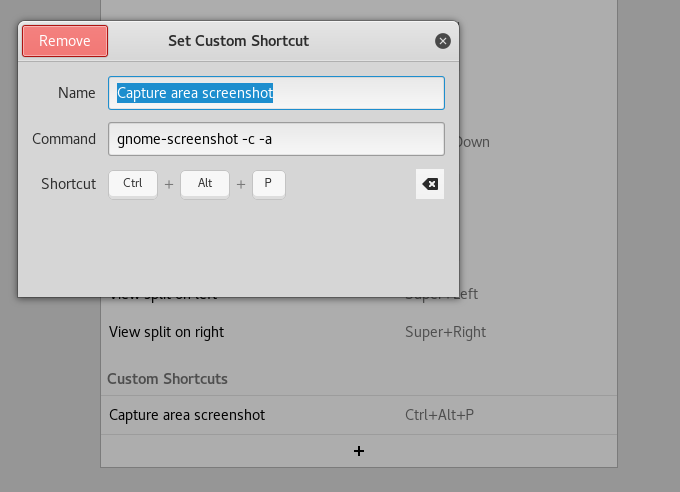
- I press a global shortcut (Ctrl-Alt-P). This invokes gnome-screenshot with predefined settings and my mouse turns into a cross cursor.
- I drag out a box. When I release the mouse button the image is placed on the clipboard.
- I click in CherryTree and Ctrl-V.
This is about as streamlined as it gets and I can add more shortcuts if I want variations. Setting it up was pretty straightforward once I found my way around GNOME. First install gnome-screenshot, which is not installed in the default Kali Linux image:
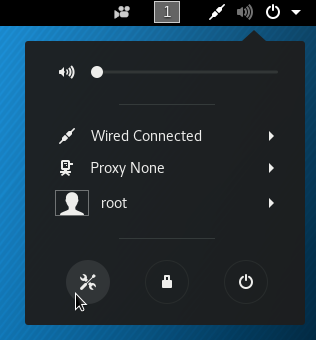
# apt install gnome-screenshotOpen System Settings from the top right menu.
Navigate to Devices then Keyboard.

Scroll down and press the + button. Add a new shortcut that calls gnome-screenshot. Here I’m saying that I want to drag out an area -a and it should copy the result to the clipboard -c.
There are lots of arguments so you can make it do what you want.
Usage:
  gnome-screenshot [OPTION…]

Help Options:
  -h, --help                     Show help options
  --help-all                     Show all help options
  --help-gapplication            Show GApplication options
  --help-gtk                     Show GTK+ Options

Application Options:
  -c, --clipboard                Send the grab directly to the clipboard
  -w, --window                   Grab a window instead of the entire screen
  -a, --area                     Grab an area of the screen instead of the entire screen
  -b, --include-border           Include the window border with the screenshot
  -B, --remove-border            Remove the window border from the screenshot
  -p, --include-pointer          Include the pointer with the screenshot
  -d, --delay=seconds            Take screenshot after specified delay [in seconds]
  -e, --border-effect=effect     Effect to add to the border (shadow, border, vintage or none)
  -i, --interactive              Interactively set options
  -f, --file=filename            Save screenshot directly to this file
  --version                      Print version information and exit
  --display=DISPLAY              X display to use
4 Comments
cizzbar
29 Dec 2019
amasing! I love you... that saved me a lot of time Thank you very much
RASHMI JYOTI
19 Jan 2020
Where will be the screenshot saved? I am trying to figure this out in Kali-linux?
Tom (author)
22 Jan 2020
@Rashmi If you follow the instructions as-is, the screenshot will not be saved anywhere. It will be on the clipboard ready to paste. If you change the parameters to use the -f option you could save it to a particular filename.
Jason
02 Feb 2020
Thanks for this! Very Useful.