Tooling around with C on watchOS
Until recently I never had a smartwatch. My old Casio F-91W is objectively superior to an Apple Watch in several ways (while clearly deficient in others). Regardless, I eventually decided to give the Series 6 a go. I have to admit the activity sharing with friends is a fun distraction. Consumerism 1 — Tom 0.
However I can pretend it was a useful purchase if I do some development with it. Like every new Apple Watch owner, the first thing I want to know is whether I can build an external C static library and use it in a watchOS project.
When I created a new project in Xcode it gave me a SwiftUI struct that looks like this:
struct ContentView: View {
    var body: some View {
        Text("Hello, World!")
            .padding()
    }
}
For some reason this ContentView.swift isn’t part of the “WatchKit App” target but actually the “WatchKit Extension”. I have no idea why, I’ve never written a watch app before. Anyhoo. What I want to do is change it to this:
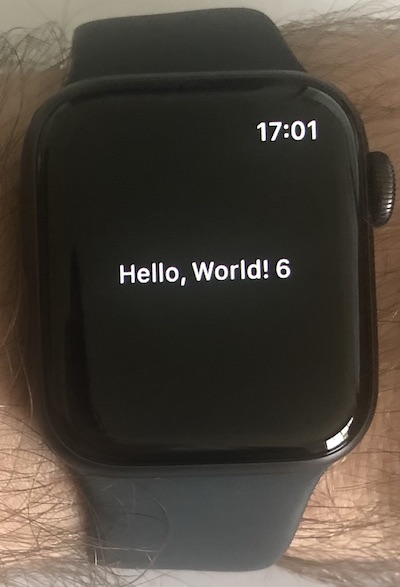
Text("Hello, World! \(add_two(4))")
Here, add_two should be a function that I implemented in C, compiled to a static library (a .a file) and then linked with my app in order to render the actual answer on screen. If I do my maths right it will show "Hello, World! 6".
Step 1 is to create the file that I want to compile. I called it ExtLib.c and as the name suggests this file is external, i.e. not included in the Xcode project.
int add_two(int n) {
    return n + 2;
}
The big question is this: what mumbo-jumbo do I have to pass to clang and libtool so that Xcode will accept my static lib into the watch app? By default clang will create machine code for my Mac’s Intel CPU when really I want to target the ARM processor in my watch. Clearly I need to specify the architecture somehow. For another thing, Xcode since version 7 has relied on operating system markers contained in the object files, meaning you could no longer take the same old x86_64 code and run it on both an iOS simulator and a Mac. You have to pick an OS and mark your object files as such. This is done via clang flags, which have changed over time.
I was unlikely to guess any of the required parameters so I cheated. I started by adding a C static library as a target within the Xcode project. This way I could open the build logs and see what parameters Xcode used.
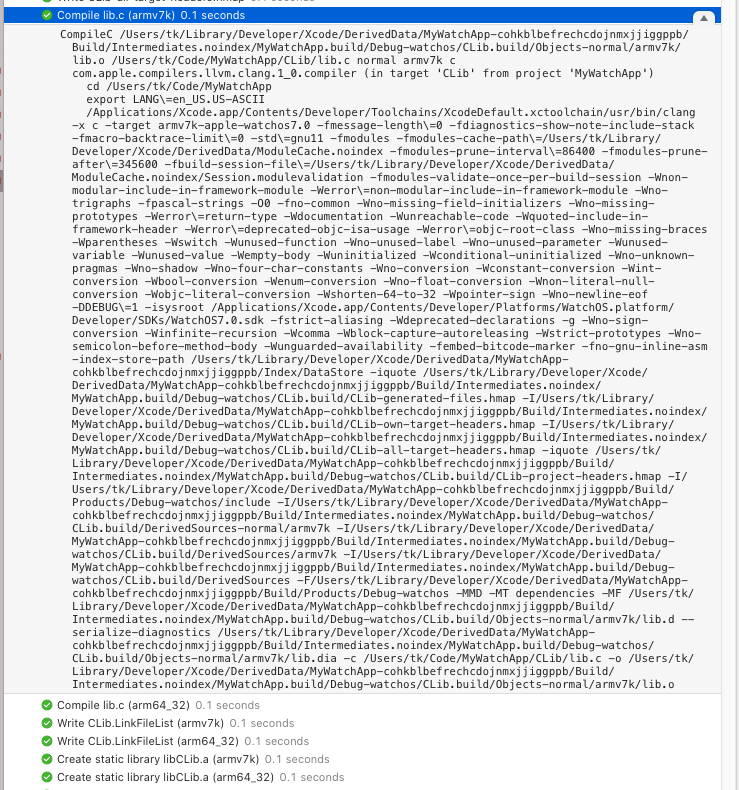
In typical Xcode style its command line is about 10 kilobytes long but thankfully we don’t need most of this stuff. Only a handful of these flags are actually important. Let’s look at them in turn.
-target x86_64-apple-watchos7.0-simulator-target arm64-apple-watchos7.0-simulator-target armv7k-apple-watchos7.0-target arm64_32-apple-watchos7.0
I observed that depending on my current target device, Xcode is building for either 2 physical architectures or 2 simulator achitectures. The simulators make sense—x86_64 for Intel Macs and arm64 for the new Silicon Macs. Then we have two different varieties of CPU for the watch itself. If my research is correct, Apple switched to 64-bit starting with the Series 4 SoC.
You specify just one of these -target options and this appears to determine the CPU architecture. However clang needs the system libraries and things, which collectively are called a “sysroot”. If you omit it you get an error like this one: clang: warning: using sysroot for 'MacOSX' but targeting 'Watch' [-Wincompatible-sysroot]. This leads us to the next option:
-isysroot /Applications/Xcode.app/Contents/Developer/Platforms/WatchOS.platform/Developer/SDKs/WatchOS7.0.sdk-isysroot /Applications/Xcode.app/Contents/Developer/Platforms/WatchSimulator.platform/Developer/SDKs/WatchSimulator7.0.sdk
We have to pick one of these depending on whether it’s a real device or the simulator. We’re really close now—but if you try to build this for a physical target it will complain that there is no bitcode present. Marker bitcode only is sufficient for development purposes, so let’s add that too:
-fembed-bitcode-marker
We can use clang -c to create the object (.o) file and then use libtool to turn it into a static library. Putting it all together:
clang ExtLib.c -o ExtLib.o -c -target arm64_32-apple-watchos7.0 -isysroot /Applications/Xcode.app/Contents/Developer/Platforms/WatchOS.platform/Developer/SDKs/WatchOS7.0.sdk -fembed-bitcode-marker
libtool -o libExtLib.arm64_32.a -static ExtLib.o
It is tempting to think this is enough, but Xcode was unhappy with having only arm64_32 code present. If I gave it this .a file it would complain that armv7k is missing. If I gave it an armv7k library it would complain that arm64_32 is missing. What worked for me was to create both of them and merge them into a fat library with lipo:
lipo -create libExtLib.arm64_32.a libExtLib.armv7k.a -o libExtLib.aWe can check that it worked.
$ lipo -info libExtLib.a
Architectures in the fat file: libExtLib.a are: arm64_32 armv7k
We can also check the operating system marker.
$ otool -lv libExtLib.a
...
Load command 1
       cmd LC_BUILD_VERSION
   cmdsize 24
  platform watchos
       sdk 7.0
     minos 7.0
    ntools 0
...
Excellent! This library is looking pretty good, at least for a physical device. Now to get it in the Xcode project…
I created a group (with folder) called ExtLib and dragged my universal libExtLib.a into it like so.
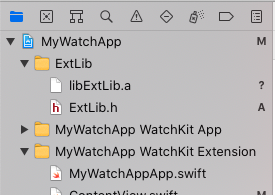
The header file ExtLib.h is one I added myself, so that Swift knows what functions are available in the static library.
#ifndef ExtLib_h
#define ExtLib_h

int add_two(int n);

#endif /* ExtLib_h */
Swift will not pick up this header automatically though. You need to include it in the Objective-C Bridging Header. While you can set this up manually, the easiest way is to add a new C file to the WatchKit Extension target. It will pop up a dialog asking if you want to create a bridging header. Having said yes, you can delete the unneeded .c and .h files. Finally, inside MyWatchApp WatchKit Extension-Bridging-Header.h we can include it, to expose our function to Swift.
//
//  Use this file to import your target's public headers that you would like to expose to Swift.
//

#include "ExtLib.h"
At this point the Swift code should pick up the add_two function and compile, but it will fail to link. The static library isn’t officially part of the Xcode project so we’ll need to configure the linker manually.
Under the “WatchKit Extension” target, first set the Library Search Paths to $(PROJECT_DIR)/ExtLib.

Finally, add the linker flag -lExtLib. Note that the universal library is assumed to start with lib, and this prefix is omitted with this flag.

What a beautiful app.