Installing GNU social
Prerequisites
Selecting a branch
GNU social has three different branches of development offering a range of choices between stability and the latest features.
- 1.2.x
- This is the current stable release. The code has been tested for a while.
- master
masterreceives more frequent updates and is usually working well.- nightly
nightlygets updated the most but is not always working.
When you download the source code in Getting it up and running you will need to know which branch you want to install. You can always move to a more unstable branch but going backwards is not guaranteed to work.
If you want to use Qvitter — that’s the plugin that makes GNU social look like Twitter — be aware that it is tested against GNU social nightly. If you are using a different branch and having problems with that plugin try upgrading to nightly.
Web server configuration
You should use HTTPS to encrypt all communications with your GNU social instance. Until recently it cost money to get a trusted certificate but now the Let’s Encrypt project enables you to obtain a trusted certificate at no cost.
If you are thinking about starting with HTTP and setting up encryption later, don’t do that. You may have problems if you start with HTTP and later move to HTTPS.
If you want to use Qvitter be aware that it only supports installations that
are installed directly on the domain. That is, the URL to access GNU social
needs to be https://www.some.domain/ and not
https://www.some.domain/gnusocial/. It also requires you to have Fancy URLs
enabled. If you’re using apache that means you need mod_rewrite and the ability
to use .htaccess files.
PHP modules
The following software packages are required for this software to run correctly.
- PHP 5.5+
- For newer versions, some functions that are used may be disabled by default,
such as the
pcntl_*family. See the section on Using Queue Daemons. - MariaDB 5+
- GNU Social uses, by default, a MariaDB server for data storage. Versions 5.x and 10.x have both reportedly worked well. It is also possible to run MySQL 5.5+.
- Web server
- Apache, lighttpd and nginx will all work. CGI mode is recommended and also some variant of ‘suexec’ (or a proper setup php-fpm pool) NOTE: mod_rewrite or its equivalent is extremely useful.
Your PHP installation must include the following PHP extensions for a functional setup of GNU social:
- openssl
- (compiled in for Debian, enabled manually in Arch Linux)
- php5-curl
- Fetching files by HTTP.
- php5-gd
- Image manipulation (scaling).
- php5-gmp
- For Salmon signatures (part of OStatus).
- php5-intl
- Internationalization support (transliteration et al).
- php5-json
- For WebFinger lookups and more.
- php5-mysqlnd
- The native driver for PHP5 MariaDB connections. If you use MySQL,
php5-mysqlorphp5-mysqlimay be enough.
The above package names are for Debian based systems. In the case of Arch
Linux, PHP is compiled with support for most extensions but they require manual
enabling in the relevant php.ini file (mostly php5-gmp).
Better performance
For some functionality, you will also need the following extensions:
- opcache
- Improves performance a lot. Included in PHP, must be enabled manually in
php.inifor most distributions. Find and set at least:opcache.enable=1 - mailparse
- Efficient parsing of email requires this extension. Submission by email or SMS-over-email uses this.
- sphinx
- A client for the sphinx server, an alternative to MySQL or Postgresql fulltext search. You will also need a Sphinx server to serve the search queries.
- gettext
- For multiple languages. Default on many PHP installs; will be emulated if not present.
- exif
- For thumbnails to be properly oriented.
You may also experience better performance from your site if you configure a
PHP cache/accelerator. Most distributions come with “opcache” support. Enable
it in your php.ini where it is documented together with its settings.
Installation
Getting it up and running
Installing the basic GNU Social web component is relatively easy, especially if you’ve previously installed PHP/MariaDB packages.
- The source code is distributed using a git repository on GNU’s Gitlab server. There are two ways to download it:
- Use git on your own computer to clone the repository. Once it is on your computer it is easy to download incremental updates.
- Download a zip or tarball from Gitlab’s web interface. This way you won’t need git but you will need to download the whole thing every time you update.
If you want to use git, run the following command. It will download the whole repository and place it in a folder called gnusocial.
git clone https://git.gnu.io/gnu/gnu-social.git gnusocialThen select the branch you wish to use:
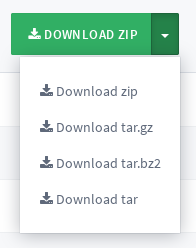
cd gnusocial
git checkout master  # or '1.2.x' or 'nightly'
If you would like to download it directly instead, go to the 1.2.x, master or nightly branch on the Gitlab web page. In the top-right corner there is a button to download a zip file containing that branch. If you press the drop-down arrow on the right you can access different types of archive.
Todo
code block the links
Unpack the tarball you downloaded on your Web server. Usually a command like this will work:
tar zxf gnu-social-*.tar.gz…which will make a subdirectory in your current directory. (If you don’t have shell access on your Web server, you may have to unpack the tarball on your local computer and FTP the files to the server.)
- Whichever way you downloaded GNU social, move the files to a directory of your choosing in your Web root directory. Usually something like this will work:
For a git repository:
cd gnusocial
mkdir /var/www/gnusocial
cp -rv * /var/www/gnusocial
For a downloaded tarball:
mv gnu-social-x.y.z /var/www/gnusocialThis will often make your GNU Social instance available in the
gnusocialpath of your server, likehttp://example.net/gnusocial. “social” or “blog” might also be good path names. If you know how to configure virtual hosts on your web server, you can try setting uphttp://social.example.net/or the like.If you have “rewrite” support on your webserver, and you should, then please enable this in order to make full use of your site. This will enable Fancy URLs support.
Make your target directory writeable by the Web server, please note however that will give all users write access and securing the webserver is not within the scope of this document.
chmod a+w /var/www/gnusocial/
On some systems, this will work as a more secure alternative:
chgrp www-data /var/www/gnusocial/
chmod g+w /var/www/gnusocial/
If your Web server runs as another user besides
www-data, try that user’s default group instead. As a last resort, you can create a new group likegnusocialand add the web server’s user to the group.
You should also take this moment to make your
avatarandfilesub-directories writeable by the Web server. The insecure way to do this is:chmod a+w /var/www/gnusocial/avatar chmod a+w /var/www/gnusocial/file
You can also make the avatar, and file directories just writable by the web server group, as noted above.
Create a database to hold your site data. Something like this should work (you will be prompted for your database password):
mysqladmin -u "root" -p create socia
Note that GNU social should have its own database; you should not share the database with another program. You can name it whatever you want, though.
(If you don’t have shell access to your server, you may need to use a tool like phpMyAdmin to create a database. Check your hosting service’s documentation for how to create a new MariaDB database.)
Create a new database account that GNU social will use to access the database. If you have shell access, this will probably work from the MariaDB shell:
GRANT ALL on social.*
TO 'social'@'localhost'
IDENTIFIED BY 'agoodpassword';
You should change the user identifiersocialandagoodpasswordto your preferred new database username and password. You may want to test logging in to MariaDB as this new user.
In a browser, navigate to the GNU Social install script; something like:
https://social.example.net/install.php
Enter the database connection information and your site name. The install program will configure your site and install the initial, almost-empty database.
- You should now be able to navigate to your social site’s main directory and see the “Public Timeline”, which will probably be empty. You can now register new users, post some notices, edit your profile, etc.
Fancy URLs
By default, GNU Social will use URLs that include the main PHP program’s name in them. For example, a user’s home profile might be found at either of these URLS depending on the webserver’s configuration and capabilities:
https://social.example.net/index.php/fred
https://social.example.net/index.php?p=fred
It’s possible to configure the software to use fancy URLs so it looks like this instead:
https://social.example.net/fred
These “fancy URLs” are more readable and memorable for users. To use fancy
URLs, you must either have Apache 2.x with .htaccess enabled and
mod_rewrite enabled, OR know how to configure “url redirection” in your server
(like lighttpd or nginx).
- See the instructions for each respective webserver software:
- For Apache, inspect the
htaccess.samplefile and save it as.htaccessafter making any necessary modifications. Our sample file is well commented.- For lighttpd, inspect the
lighttpd.conf.examplefile and apply the appropriate changes in your virtualhost configuration for lighttpd.- For nginx, inspect the
nginx.conf.samplefile and apply the appropriate changes.- For other webservers, we gladly accept contributions of server configuration examples.
Assuming your webserver is properly configured and have its settings applied (remember to reload/restart it), you can add this to your GNU social’s
config.phpfile:$config['site']['fancy'] = true;
You should now be able to navigate to a “fancy” URL on your server, like:
https://social.example.net/main/register
Themes
As of right now, your ability change the theme is limited to CSS stylesheets and some image files; you can’t change the HTML output, like adding or removing menu items, without the help of a plugin.
You can choose a theme using the $config['site']['theme'] element in the
config.php file. See below for details.
You can add your own theme by making a sub-directory of the ‘theme’ subdirectory with the name of your theme. Each theme can have the following files:
- display.css
- a CSS2 file for “default” styling for all browsers.
- logo.png
- a logo image for the site.
- default-avatar-profile.png
- a 96x96 pixel image to use as the avatar for users who don’t upload their own.
- default-avatar-stream.png
- Ditto, but 48x48. For streams of notices.
- default-avatar-mini.png
- Ditto ditto, but 24x24. For subscriptions listing on profile pages.
You may want to start by copying the files from the default theme to your own directory.
Private
A GNU social node can be configured as “private”, which means it will not federate with other nodes in the network. It is not a recommended method of using GNU social and we cannot at the current state of development guarantee that there are no leaks (what a public network sees as features, private sites will likely see as bugs).
Private nodes are however an easy way to easily setup collaboration and image sharing within a workgroup or a smaller community where federation is not a desired feature. Also, it is possible to change this setting and instantly gain full federation features.
Access to file attachments can also be restricted to logged-in users only:
Add a directory outside the web root where your file uploads will be stored. Use this command as an initial guideline to create it:
mkdir /var/www/gnusocial-files
Make the file uploads directory writeable by the web server. An insecure way to do this is (to do it properly, read up on UNIX file permissions and configure your webserver accordingly):
chmod a+x /var/www/gnusocial-files
Tell GNU social to use this directory for file uploads. Add a line like this to your
config.php:$config['attachments']['dir'] = '/var/www/gnusocial-files';
Extra features
Sphinx
To use a Sphinx server to search users and notices, you’ll need to enable the
SphinxSearch plugin. Add to your config.php:
addPlugin('SphinxSearch');
$config['sphinx']['server'] = 'searchhost.local';
You also need to install, compile and enable the sphinx pecl extension for php on the client side, which itself depends on the sphinx development files.
See plugins/SphinxSearch/README for more details and server setup.
SMS
StatusNet supports a cheap-and-dirty system for sending update messages to mobile phones and for receiving updates from the mobile. Instead of sending through the SMS network itself, which is costly and requires buy-in from the wireless carriers, it simply piggybacks on the email gateways that many carriers provide to their customers. So, SMS configuration is essentially email configuration.
Each user sends to a made-up email address, which they keep a secret. Incoming email that is “From” the user’s SMS email address, and “To” the user’s secret email address on the site’s domain, will be converted to a notice and stored in the DB.
For this to work, there must be a domain or sub-domain for which all (or most) incoming email can pass through the incoming mail filter.
Run the SQL script
carrier.sqlin your StatusNet database. This will usually work:mysql -u "statusnetuser" --password="statusnetpassword" statusnet < db/carrier.sql
This will populate your database with a list of wireless carriers that support email SMS gateways.
Make sure the
maildaemon.phpfile is executable:chmod +x scripts/maildaemon.php
Note that “daemon” is kind of a misnomer here; the script is more of a filter than a daemon.
Edit
/etc/aliaseson your mail server and add the following line:*: /path/to/statusnet/scripts/maildaemon.php
Run whatever code you need to to update your aliases database. For many mail servers (Postfix, Exim, Sendmail), this should work:
newaliases
You may need to restart your mail server for the new database to take effect.
Set the following in your
config.phpfile:$config['mail']['domain'] = 'yourdomain.example.net';
After installation
Run queue daemons
By default GNU social tries to do regular work such as communicating with remote servers while it is handling HTTP requests for users. This is often insufficient. If possible you should run the queue daemons. Please refer to this section: Using Queue Daemons.
Backups
There is no built-in system for doing backups in GNU social. You can make backups of a working system by backing up the database and the Web directory. To backup the database use mysqldump and to backup the Web directory, try tar.
Upgrading
Upgrading is strongly recommended to stay up to date with security fixes and new features. For instructions on how to upgrade GNU social code, please refer to this section: Upgrading Your Installation.