Getting Started
Choosing a server
You have to make one decision to get on GNU social: which server to use. If you’re technically inclined and want to host your own then you can do that. For everyone else there are many choices available. Many of them are listed on this webpage.
If you don’t want to shop around, these are some popular choices, particularly for English speakers:
For Spanish speakers, there’re this choices:
There is a small advantage in choosing either a local server or a server where you already know people. Every server has a user directory that lists all the accounts registered there. This can make it easier for others to stumble across you.
Although there are many servers not all of them allow members of the public to create new accounts. The administrator of each server can turn this feature on or off.
Registering an account
In this example we will use Quitter.no, which allows new users to register freely. This server looks very similar to Twitter because it is using a plugin called Qvitter. If you don’t like the appearance then you can simply pick a different server.
It has a Sign Up section on the bottom-left of the home page. Enter your basic information and click Sign up to Quitter.no:

You will be prompted for extra information:
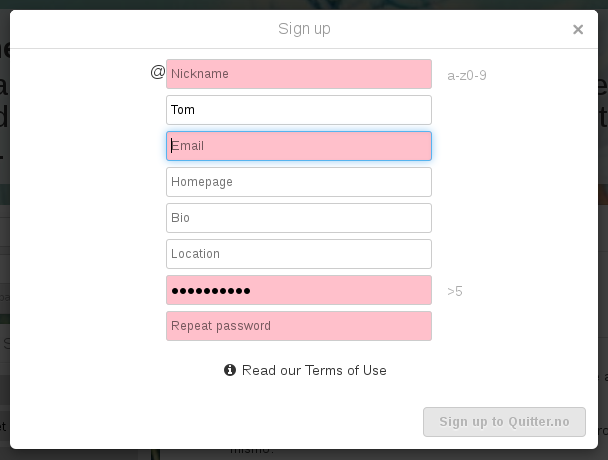
Your nickname is the main name for your account. You won’t be able to change it so choose carefully. You can also set a “Full Name” that appears on your profile and alongside your notices. Don’t feel obligated to use any real information—anonymous and pseudonymous users are very welcome on GNU social.
A working email address is normally required for account verification. You can use it to receive email notifications too.
Choose a good password. As always it is a good idea to use a password that you don’t use anywhere else. Free software like KeePassX can help you generate and remember your passwords.
Press the Sign up to Quitter.no button. You can start using your account right away but you should confirm your email address when the email comes through.
Congratulations! You’re on GNU social!
Publishing a notice
Depending on which server you’re using you might see something different once you log in. Here are two examples:
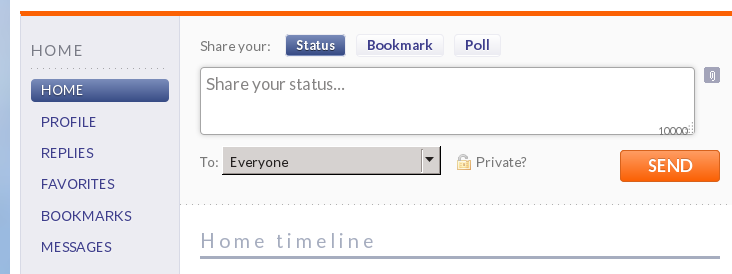
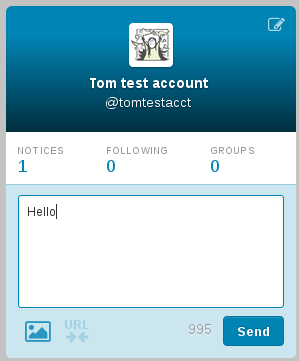
In both cases you have a text box to type a message. Click inside it, type a notice, then click Send to publish it to your followers.
Favouriting, Repeating and Replying
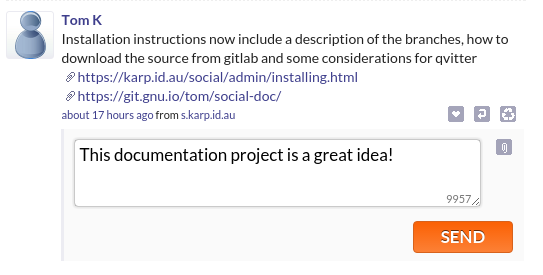
After you have followed a few of your friends and interesting people on the network you will see their posts on your “HOME” newsfeed. Below each post are some icons that allow you to interact with the notice and/or the original poster.
Clicking on the  will add a post text field to the page and allow
you to respond to the post. Your reply will then appear as a threaded notice
underneath the original post, as in this example:
will add a post text field to the page and allow
you to respond to the post. Your reply will then appear as a threaded notice
underneath the original post, as in this example:
Clicking on the  will add the post to your list of favourite
posts. This also pings the original poster alerting them that you favourited
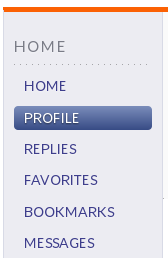
the post. You can see your list of favourite posts by clicking on the
“FAVOURITES” link on the left navigation bar. If you are using Chimo’s Reverse
Favourites plugin you can see who has favourited your previous posts.
will add the post to your list of favourite
posts. This also pings the original poster alerting them that you favourited
the post. You can see your list of favourite posts by clicking on the
“FAVOURITES” link on the left navigation bar. If you are using Chimo’s Reverse
Favourites plugin you can see who has favourited your previous posts.
Clicking on the  will repeat the notice so that it will be shared
to your own list of followers, and as such probably implies another more
explicit favour to the original post.
will repeat the notice so that it will be shared
to your own list of followers, and as such probably implies another more
explicit favour to the original post.
Hashtags, Mentions and Groups
In addition to the above methods to interact with followers network, GNU social also supports features you will find familiar with other social networks. You can mention someone else in a post by using the ‘@’ prefix. This example shows how to mention someone, and how the post will look after you post it.
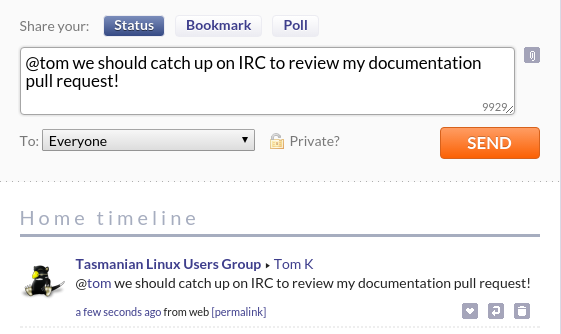
You don’t have to use the full username@domain.tld format when mentioning
someone. If you leave out the full @domain.tld part of a user you are
mentioning then you are limiting the scope to people on your local instance and
your followers.
The social network hashtag ‘#’ prefixed before a word, eg #federated makes keywords trend on your home feed and across the federated network as more people use the same hashtag.
Groups are an optional part of GNU social. Each social instance can have one or more groups based on a topic. Then local users of the instance as well as remote social users can subscribe to the group. A group is similar to a user in GNU social but you refer to a group using the ‘!’ prefix instead of the ‘@’ prefix.
When you find a group on your local GNU social instance, or a remote instance you can follow it in a similar way to following users, simply enter your GNU social username when prompted after clicking on the “Join” button.
You can post a notice to the group by mentioning the group with a ‘!’ prefix, for example:

Your post will then appear in your follower’s feeds as well as anyone else subscribed to the group who may or may not also follow you.
Referring to your account
For somebody else to find you on GNU social you need to give them two pieces of information:
- What server you’re on — for example, quitter.no
- Your account name. That’s the one starting with an @ — for example, @fred
There are three different ways of referring to your account and they’re useful at different times.
Your profile URL
If you want someone to check out your account the easiest thing is to give them a link to your profile. They don’t need a GNU social account of their own. If they have one and they want to follow you they will be able to do that easily from this page.
To access your profile click on your name. On quitter.no it’s in the top-left and looks vaguely like this:

On a more standard server you can look for something in the menu called Profile:
Either way once you get there your browser will be at a URL that looks similar to this:
https://quitter.no/fred
Take that URL and give it to the person who wants to see your account.
Doing a remote follow
Another way to describe your account is like an email address. You write your username, move the @ from the start to the end, then write the server without any https or slashes:
fred@quitter.no
This is what you need to type in if you are doing a Remote Follow—that is, following someone on a different server from you. More about that in a later section: Following people on other servers.
Writing notices
If you’re writing a notice and want to mention another user simply tag their account with an @ like this: @fred - Have you met @sandra? She’s a colleague of mine.
You might be thinking that the server part is missing. You’re right! But GNU social is clever. If you use an @ tag in a notice it assumes you must be talking about someone you follow. It looks through its database to find which account has that name and fills out the server part behind the scenes.
Next steps
In this part you signed up for GNU social and sent your first notice. This will quickly get boring unless you find some other people to follow. The next part describes the different ways you can explore the GNU social network and see what everyone else is saying.